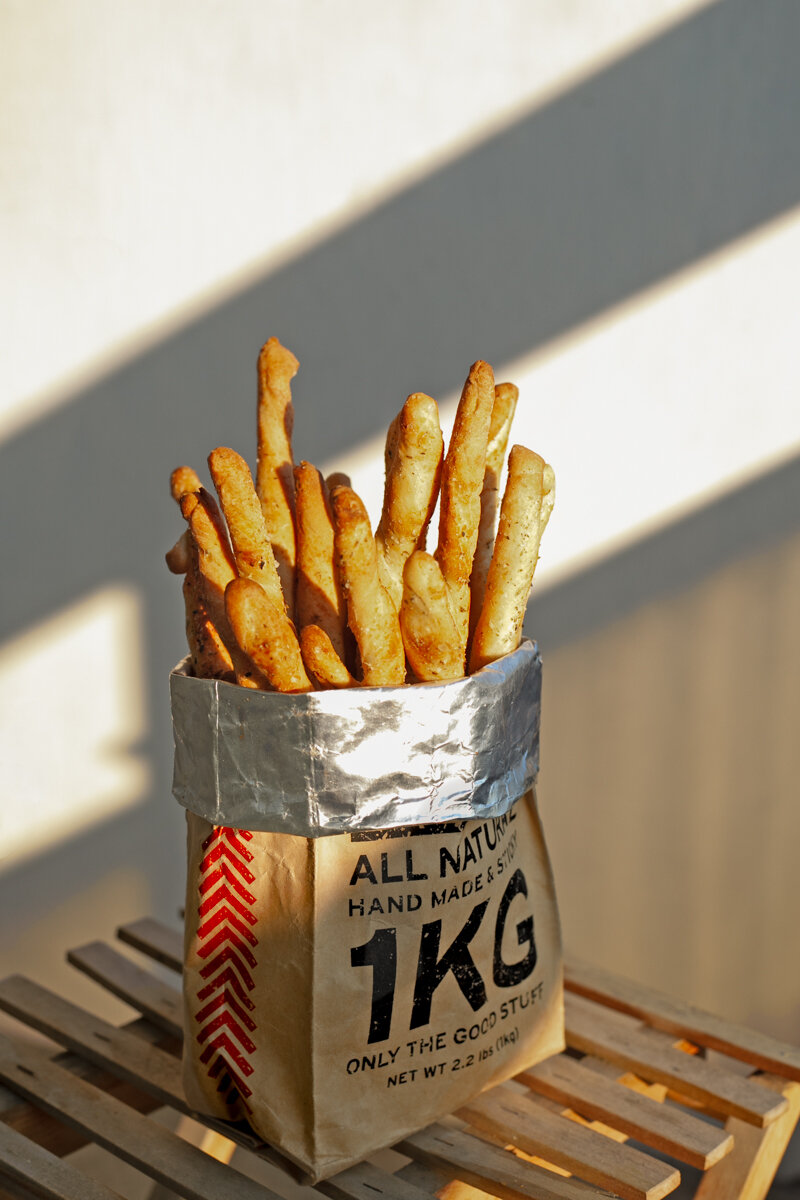
Breadsticks accented with parmesan and oregano.
Ahhh, the golden hour. Nothing beats a moment like soaking in the light just before the day’s end; a perfect backdrop to apéro, where friends get together for pre-evening drinks. To me, apéro is like happy hour; it’s drinks with the radishes, charcuterie, pâté, olives, veggie sticks and/or dips. If you want to get even fancier, you can flaunt your stylish verrine glasses to star your amuse bouche; however, It can also be as simple as having a bag chips and nuts.
Apéros can override dinner and last late into the night. My only gripe with it is not knowing whether dinner will follow or not, and not being able to gauge how much I should eat and drink just in case the main course does make an appearance with that special bottle of reserved wine. Apéros can be held in the comforts of one’s own home or sprawled out in a common open space, with those extras I mentioned above. Bascially, if you find a nice spot and have nice weather, you can just plop yourself down anywhere and start your apéro…simple as that.
Hosting apéros is not my forte but I am the perfect guest. Invitations are nil now—it’s Corona’s fault. Since confinement, “Zoom” and “Houseparty” apéros have popped up. It’s really not my thing but I can appreciate it on occasion. I’m holding out for the real thing.
We’ve been blessed with beautiful weather since our lockdown. Most of the days, hubby and I are lucky enough to step out onto our balcony to enjoy the warm embrace of the sun rays. We’ve been keeping apéro to a minimal— as it tends to override dinner and last late into the evenings— otherwise, our diet would consist of just pastis and peanuts. So remember, I am that perfect guest.

Breadsticks accented with parmesan and oregano. Call it gressins, grissini, or breadsticks but they have one thing in common; they are crunchy.
On a late afternoon, hubby and I were glowing away under the spell of the golden hour with a pastis in hand ready to make a birthday toast to our friend, Stéphane, over a computer screen. We found him and his wife crunching away on these homemade breadsticks with a glass of wine in hand. Always so elegant.
I received this homemade gressin recipe in my inbox the next day. Stéphane makes everything from scratch and he’s my go-to guy when I have any doubts about French cooking. He doesn’t complicate things although he has the patience to make intricate recipes when he wants to and he’s also very generous in sharing cooking tips and recipes. He’s also on my list for a Peek in the Kitchen, so keep an eye out for him. Lucky him, he’s paired up with Sandrine, who makes the most delectable desserts. Together, they are very crafty with their hands; they love to while away time thrifting through flea markets. Their house is designed with pieces they refurbish and thoughtfully decorated with the hidden gems they find. Often, apéro is served in some old find of theirs which lends to beautiful stories shared with us. This is one of my favorite places to be invited to for apéro, something is always cooking or coming out of the oven.
Gressins
INGREDIENTS//Yields approximately 2 1/2 dozen
• 500 grams flour
• 10 grams salt
• 3 grams sugar, finely granulated sugar
• 15 grams fresh yeast (I used dry yeast)
• 240 ml water, room temperature
• 90 ml olive oil
• A handful of semola (optional)
• A handful of your preferred choice of drid herbs, grains, and/or parmesan cheese.
INSTRUCTIONS
Sift your flour into a large mixing bowl and combine wtih the sugar and salt. Make a well.
Seperately, activate the yeast in the room temperature water. Then pour it along with the olive oil into the well of the dry mix.
Knead quickly with your hands or with a dough mixer. If you are kneading with your hands you may want to dust your hands with some extra flour and knead the dough until it becomes a smooth malleable ball that doesn’t stick and springs back when you push a finger into it. (Kneading by hand takes about 12-15 minutes)
Cover the ball of dough with a tea towel and let it rest for 15 minutes.
Dust your dough with flour and flour your workspace. Place your ball of dough on the workspace and start to press down on it with the heel of your hand and roll it out.
Roll it out into an oblong shape, then fold in the ends to meet in the middle, and then fold again in half.
Turn the folded dough so that the longer ends are at the top and bottom, roll it out and repeat one-two more times.
Roll it outand shape it into a rectangular shape about a half inch thick to fit on your baking sheet. Cut around the edges to create a smooth edge.
Line your baking sheet with parchment paper and dust it with some semola, then transfer the dough onto it.
Lightly brush the surface of the dough with some olive oil nd sprinkle your choice of dried herbs, grains, and parmesan cheese all over along with a small handful of semolina. Press it in with the palm of your hands.
Cover with cling wrap and let it sit for an hour and a half in room temperature. It will rise.
Preheat your oven to 190 degrees celsius( 375 degrees fahrenheit)
Cut the dough into 1.5 cm width strips (you can twist the strip in opposite directions) and place it on a seperate baking sheet . Place them about an inch and a half apart.
Place in oven for around 6-8 minutes depending on your oven or until golden.
Let it cool on the rack. It should be nice and crunchy.