It's not Bastille Day, it's le quatorze juillet, la Fête Nationale.

I just discovered that Bastille Day is a British term and that's what I always referred to it as when growing up in New York.  In New York, there were annual street fairs celebrating Bastille day with French food and wine.  Even contests were set up so that one could win a roundtrip airfare to Paris and back.  

Living in the know and now in France, we simply refer to it as le quatorze juillet and it is formally called la fête nationale.  Festivities start with the Fireman's Ball in various fire stations across Paris on the eve, then a morning military parade on the Avenue des Champs Elysées, and closes with an evening fireworks display from the Eiffel Tower. 

History in a nutshell:  Mutinous minds were brewing a few years earlier leading up to the start of the French Revolution which began with the storming of the Bastille prison on July 14, 1789.  Living in a feudal aristocratic system with the philosophes of Enlightenment, a weak monarchy, and with escalating food and taxe prices—let's just say that some people were not happy.  

The Bastille prison symbolized the arbritrary use of power of the French monarchy.  It's where upper-class and political prisoners of French society were held, unopen to trial, and only under the king's orders.  Thus, attacking it signified the start of a revolution which led towards years of violence and bloodshed—although not so much on that particular day.

Excactly one year after the storming of the Bastille, the Fête de la Fédération was inaugurated on July 14, 1790 to celebrate the unity of France, symbolizing peace.  July 14th commemorates the storming of the Bastille and the Fête de la Fédération.

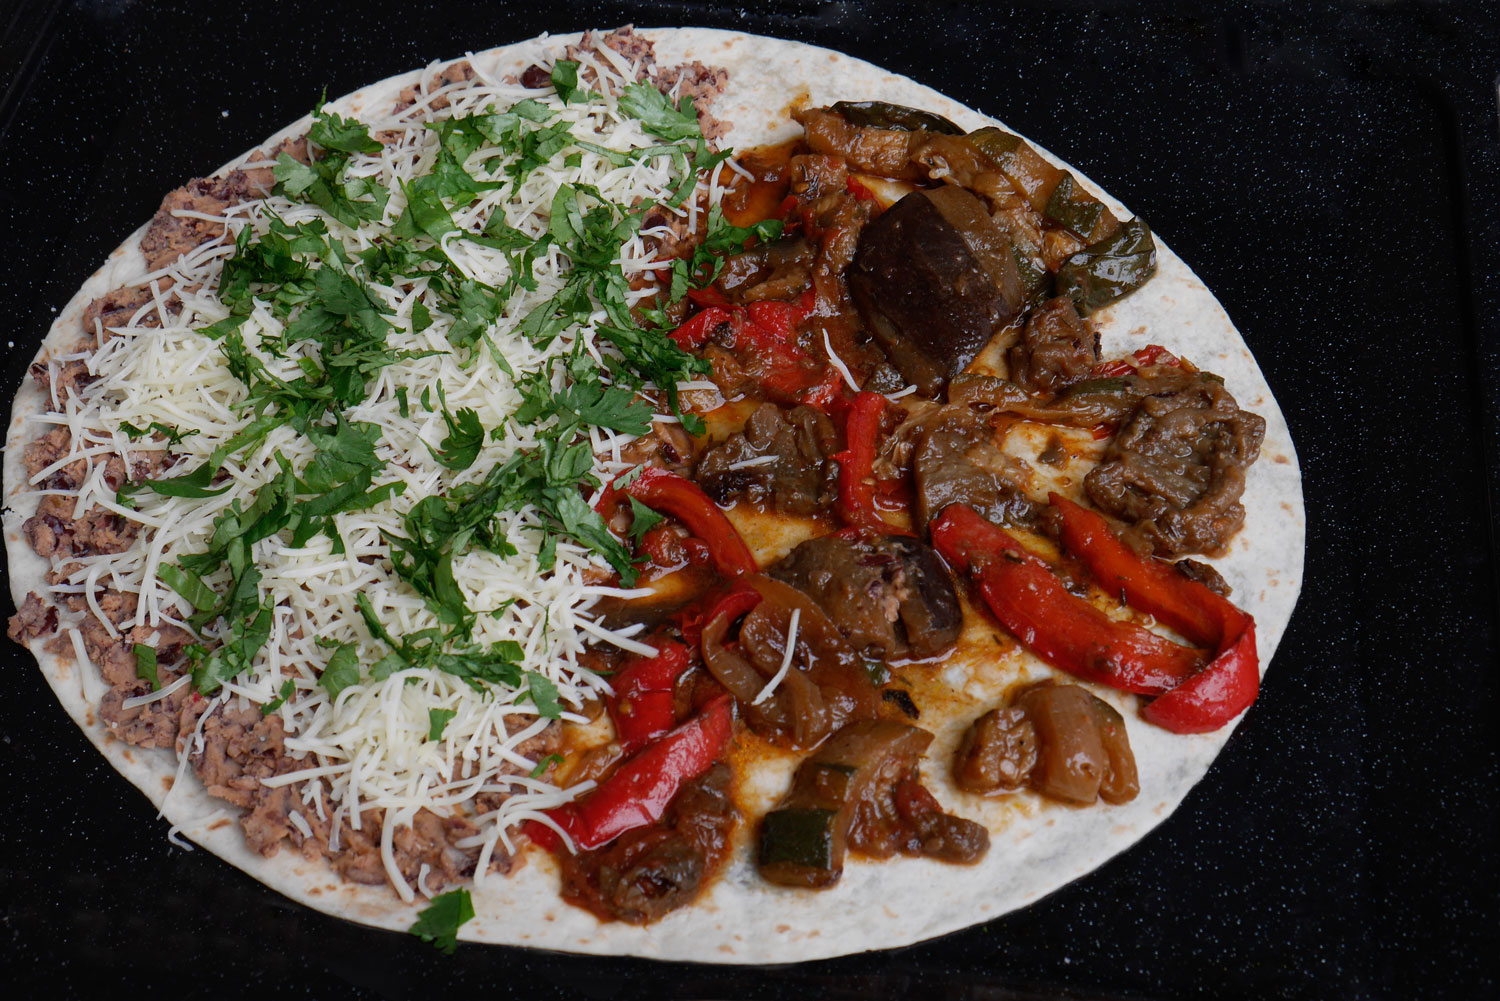
Here's a taste of symbolism for you pictured below...

Grilled Magret de Canard

Grilled Magret de Canard

And if you keep scrolling down to the bottom, I leave you with Serge's scandalous version of La Marseillaise, the French national anthem. 

Vive la France!  Vice la République!

 Grilled Magret de Canard

INGREDIENTS//Serves 2-3

• 1 farm-raised magret de canard (this particular piece weighed 394 grams, vacuum-packed)
 

INSTRUCTIONS

Pre-heat your oven to 220° C. 

Lay your naked duck breast with skin facing up.  Score the skin of the duck in squares without cutting into the flesh. 

Pop the duck into the over with the skin fat face up for 15 minutes. 

After 15 minutes, flip the duck over and then lower the temperature to 180°C and let it cook for 10 minutes. Take it out of the over and and cut into slices. 

Serve it along with some roasted potatoes and garlicky green beans.

NOTE

I'm a pesco-vegetarian with lots of taste testers amongst me.  Apparently this gets a thumbs up with my carnivorous family.  You can't screw this recipe up, just throw it in the oven!
 

Summer Soba Noodles

Green tea soba with seasonal vegetables and shredded nori.

Green tea soba with seasonal vegetables and shredded nori.

Alas, summer is here.  I wouldn't have guessed it, and neither would you if you had seen me recently walking around town with a light sweater, sleeveless-down vest and a scarf on—oh, and an umbrella to boot.  It wasn't until I got into the elevator when my neighbor greeted me and reminded me that summer has arrived, and then it began to dawn on me.

Peppy and eager, even through the thick of rain and gray clouds—ahh, but summer is here—to share my summer lovin' soba noodle dish with my family and friends, I bought some green tea soba noodles (photos above) and the typical buckwheat noodles (photos below) to add some fun for the kids. 

Soba Noodles with tofu strips

Soba Noodles with tofu strips

You can add your choice of vegetables and protein to make it your own perfect summer dish.  Alas, the sun is shining—for summer is here. 

いただきます! 

Itadakimasu!

Summer Soba Noodles

INGREDIENTS//Serves 4

•  400 grams soba noodles
•  1/2 red pepper, raw and sliced finely
•  1/2 orange pepper, raw and julienned
•  2 zucchini, raw and julienned entire length (think zoodles!)
• 200 grams tofu strips
• 2 scallions, finely sliced

Homemade tsuyu sauce

• 1/2 cup kaeshi
• 3/4 cup dashi

PREPARATION

Rinse and wash well your pepper, zucchini, and scallions.

Cut your pepper in half and rinse out the seeds.  Use a mandoline with just the blade (no teeth), slice finely your pepper.  Place it in a bowl and set it aside.

Peel alternating slices of the zucchini skin off to give it some texture and color.  Run it along a mandoline using the blade with the fine teeth blade lengthwise until you reach the seeds, then turn it and repeat.  Discard the seeds. Place it in a bowl and set it aside.

Slice your scallion.  Place it in a bowl and set it aside.

Sauce: Mix the two parts together and set it aside.

INSTRUCTIONS

Fill a large pot of water and bring it to boil.

Add the soba noodles following the instructions on the back of the package for cooking time.

Drain your noodles in a colander.  Transfer it back into the pot with running cold water.  Press the noodles down with your hand if they start coming up over the pot.  Use your hands to separate the noodles and aid the rinsing process to wash away the starch.  Drain the noodles again.  Begin to separate and place them in the four serving bowls.

Add a handful of zoodles, peppers, and tofu strips.  

Mix in your sauce and top it off with some scallion and sesame seeds.

NOTE

Tsuyu sauce can be found in most Asian stores.  It is usually sold concentrated.  Dilute it with water, just enough to keep its flavor but not so much that it tastes watered down.


Ratatouille Quesadilla

Ratatouille-quesadilla2.jpg

I just got back from San Diego, where I was paying a visit to meet my newborn niece, Sabine.  Unbiased of course, she is gorgeous.  Her nickname is "Bean" because that's what came out of her older sister's mouth when she was all of one year old trying to pronounce "Sabine".   Ever since she started out as a 'lil bean in her mama's belly, she's been referred to as "Bean".

Bean has that baby smell that I quickly got addicted to.  Every early morning, 6 a.m. to be precise, I would wake up and head to the kitchen: to find her, hold her, press my nose against her head and then inhale her baby scent.  If you are wondering why the kitchen, it's because my brother-in-law has started his day and mine (bless his heart) with a whole other scent, the coffee dropJapanese style drip.  He has his tools in order: grinder, scale, and drip filter,

This is how my mornings played out until I got over my jet lag: rise and shine at 6 a.m. soon became rise and snooze til 9 a.m.  Although I still had Bean's baby scent to look forward to, gone was the aroma of the other bean the coffee beanMy brother-in-law was long gone and off to work.

Besides sniffing Bean's head and drinking coffee from the drip, I did eat a lot of Mexican food.  Afterall, San Diego is just next door.  I thought I knew it all from my days milling about at Mexican family soccer games in some Brooklyn park, where I could eat freshly made tortillas and salsa off their portable, makeshift grills right out of the backs and trunks of their cars, and buy Tecate beers straight from their coolers, all for two dollars.  Apparently not.
 

Ratatouille-quesadilla.jpg

I discovered an ingredient called hominy that I'll have to search for in Paris.  Once I find it, I'm keen on making a fish based or vegetarian based pozole which I'll share with you in the future.  As for now, I have French Provençale ratatouille leftovers that I've converted into a Mexican quesadilla dish.  Olé!

Ratatouille Quesadilla

INGREDIENTS//Serves 4

•  1 x 400 gram tin of red kidney beans or other bean of preference
• 1 shallot, chopped
• 1 tablespoon cumin
• 1 teaspoon chili powder
• 150 grams of emmental cheese
• 2 cups ratatouille or any vegetable filling
• 1/2 bunch fresh coriander (cilantro)
• 2 large flour tortillas
• Dallop of sour cream or crème fraîche

INSTRUCTIONS

Add some cooking oil in a pan and cook the shallots over medium heat until they have softened. 

Add the tin of beans and stir.

Throw in your spices: cumin, chili powder.   Stir it up a bit.

Then transfer it to a small mixing bowl and mash it up with a fork or a masher.

Since I had ratatouille left over, you can choose any combination of vegetables; just cook it beforehand.   My kids love this with spinach, so I simply steam the spinach.

Lay out your tortilla and spread half of it with the bean mash, and the other half with your vegetable filling of choice.  Be careful not to add too much filling otherwise it will fall out.  Try to keep it thinly spread.  Sprinkle some coriander over the cheese.

Grab two to three handfuls of cheese and spread over the beans.

Place it on a large cooking pan over medium heat and cook until the bottom of the tortilla warms up and starts to speckle up golden brown.

Using a spatula, fold the quesadilla in half.  Press down on the quesadilla with the back side of the spatula and cook until the whole side is golden brown and then flip and repeat.

Transfer to a cutting board and cut them into wedges.

Serve along witha dallop of sour cream or crème fraîche (depending on which country you live in) and garnish with coriandre.


Chickpea Sweet Corn Veggie Power Patty

When it comes to serving a veggie patty chez moi, I have to dress it up for my husband.  He's been raised a true carnivore and he's ambivalent towards words like "veggie patty".  It's not that he doesn't like his veggies, he does; he just doesn't need them to be meat replacements.  So no interpretations needed for a burger at ours.  I just serve him the whole veggie plate experience.  There's sustenance to these power patties and they go great on a salad and keep you nourished for hours.  

Veggie patties are wonderful since you can mix any veggies you want in it along with any spices, beans, grains, or tofu, and usually some breadcrumbs and nuts.  I played around and grounded whole oats to use as my binder.  This replaced the breadcrumbs.  This recipe is just one of many that you can conjure up in your own magic mixing bowl. 

Chickpea Sweet Corn Carrot Veggie Patty

BAKE TIME

Total bake time is 20 minutes at 200° C (390° F). 
10 minutes per side.

INGREDIENTS//yields 12 medium size patties or 16 small patties

• 3 cups chickpeas (2 x 400 gram tinned chickpeas)
• 2 teaspoon cumin
• 2 teaspoon paprika
• 3 clove garlic, minced
• 1/2 teaspoon chili powder
• 2 cups sweet corn (15 oz tin or 425 ml tin)
• 1 carrot, grated (optional)
• 50 grams of almonds, finely chopped
• 1/2 bunch of fresh flat parsley, finely chopped
• 1 shallot, chopped
• 100 grams of roasted kasha (buckwheat) groats, blended into crumbs
• 50 grams whole oats, blended into flour
• 200 grams feta cheese (optional)
• Salt (adjust according to taste)

PREPARATION

Blend your whole oats and almonds separately and put it in aside.
In a food processor, finely chop your parsley and shallot.  Lay it aside in small bowl.

INSTRUCTIONS

In a small size pan, heat up some cooking oil, and cook the grated carrots until softened.  Then set it aside to cool.

In a large mixing bowl add the chickpeas and mash by hand using a masher making sure no whole pieces are left.  Mash until soft but with some coarse texture left in it.

Mix in your spices: cumin, paprika, chili powder, garlic.

Add the sweet corn and the cooled cooked carrots.  Combine together.

Add the blended oats.

Crumble the feta cheese and add it into the mix (optional).

Stir in the almonds, shallots, and the parsley.

Add salt according to taste.

Scoop the mixture with wet hands to form your patties.

Using a basting brush, slightly brush the sides of the patty with olive oil.

Pre-heat your oven and line your baking tray with parchment paper.

Coat your patty lightly in the blended roasted kasha and place on the baking tray.

Put it in the oven and bake at 200°C for 20 minutes.


NOTE

I did have some dried herb called ache de montagne on hand so I crumpled some up for seasoning.  It happened to be one of those seasonal herbs added into an organic basket from the local farmers.  I did some research and it's called lovage in English.  It has an unsubtle taste, much like celery. 


Tzaziki


INGREDIENTS

• 1/2 English cucumber (long green ones), deseeded and grated (preferably organic so you can keep the skin on)
• 150 grams of Greek yogurt
• 1/4 clove garlic, crushed and minced
• 1 tablespoon olive oil
• 1/2 tablesoon lemon juice
•  1 tablespoon chives, diced
•  Salt (according to taste)

INSTRUCTIONS

If you are using an organic cucumber there is no need to peel it.  However, with a conventional cucumber I usually peel the skin off.  Halve the cucumber lengthwise.  Take a teaspoon and scrape out the seeds. 

Grate the cucumber using the large hole of a box grater.

Salt the deseeded and grated cucumber and let sit for 15 minutes so that the water comes out of it. 

Mix the garlic, olive oil and lemon juice into the yogurt.  Stir well. 

Squeeze the excess water out of the cucumbers using your hand or a cheesecloth and then add the cucumbers into the yogurt mix.

Add the chives and salt to taste.
 

Tarte aux Épinards

This is one of my first, self-impressed French dishes I have ever made.  I learned it from ma belle-mère—yep, my mother-in-law— that's how we address our mother-in-laws in France.  It can be so ironic for many, but I got lucky; I truly do have a belle-mère. 

The kids call her "Mamie Jacotte", an affectionate term rather than the literal translation, "grand-mère";  Jacotte is shortened from Jacqueline.  She's not only a fantastic belle-mère and grand-mère, but a wonderful cook.  I have picked up many of her tips and recipes in cooking and this is just one of many. 

Ma belle-mère makes simple and intricate dishes.  I usually opt for the former recipes.

Tarte aux Épinards

• 1 puff pastry
• 500 grams spinach, frozen or 700 grams of spinach, fresh
• 1 clove garlic, minced and sauté
• 4 eggs
• 4 heaping tablespoons crème fraîche
• 100 grams of emmental cheese
• a pinch of nutmeg
• Salt and pepper according to taste

INSTRUCTIONS//serves 4-6

Take your tart or quiche pan (around 10 inches in diameter, 1-1/2 to 2 inches deep or 25 cm in diameter, 4 cm deep) and roll out the puff pastry and place it into the pan.  Press the pastry into the sides of the pan. 

Use a fork to poke some holes into the bottom of the puff pastry to release any trapped air and to keep it from puffing up when baking. 

Once your oven is pre-heated at 190° C (375°F), place it in the oven to bake for around 10 minutes or until the puff pastry changes color to a golden brown.   This step is called blind baking; It partially cooks the pastry dough to prevent a soggy crust.  Check often during the duration of this time so that if you catch your pastry puffing up, just slide it out of the oven, take a fork to poke more holes and press the pastry back down into place, and place back into the oven.  Some people use ceramic beans or dried beans to keep the pastry from puffing up. 

Take it out of the oven and place the spinach filling inside.

Spinach Filling:

If you are using frozen spinach, cook it down on low heat until it thaws.  Drain out the excess liquid.  If you are using fresh spinach, begin with the the next step.

Sauté your garlic in a pan with a half tablespoon olive oil over medium heat. 

Then add your spinach and toss it around with the garlic.  Sauté for a couple of minutes and add some salt.  With fresh spinach, sauté and then cover the pan with a lid to let cook for 5-10 minutes or until wilted.  It should be a nice, saturated green.  With a pair of tongs, take out the cooked spinach and place it in a bowl and leave it aside to cool down.  Push down with the pair of tongs or a fork to get rid of excess liquid.

In a medium size mixing bowl, beat in 4 whole eggs.

Add your heaping dallops of crème fraîche and mix.

Stir in the emmental cheese.

Then a pinch of nutmeg, some salt and pepper according to taste.

Mix the spinach in with the egg, crème fraîche, cheese batter.  Stir until the spinach is evenly mixed in.

Pour this mixture into your blind baked puff pastry and place it in the oven for 40-45 minutes at 190° C (375° F).
 

NOTE

I have used both fresh and frozen spinach for this recipe.  It just depends on what I have in my fridge.  In France, I buy the frozen spinanch with their stems (épinards en branche).  If I use fresh spinach I trim the thicker part of the stems and keep an inch or two below the leaf.  You can also use 125 grams of yogurt to replace the crème fraîche. 

Spinach Wonton Ravioli

Viktor, my six year old son, and I filled and folded 35 spinach wonton raviolis.  He's quite the meticulous one; thus, the model perfect raviolis.  It was a cold and gray afternoon, and we were cozy at home busy adding more raviolis to our lot and looking forward to dinner.

SpinachWontonRavioli2.jpg

It snowed while Viktor and I were setting up to photograph these wonton raviolis.  We were so engrossed with how to steady the reflector while he would be assisting in the "snowfall scene" of the Parmigiano Reggiano that we didn't even notice the real snowfall scene happening right outside.  It was already late in the afternoon and we were racing against the light of day.   He was busy grating away at the cheese and I was looking through the view finder trying to capture the moment.  Through the view finder all I could see were these white, fluffy flakes of cheese falling upon the wonton raviolis and thinking to myself, this looks like a beautiful snow flurry scene and how nice it would be if it happened just once before spring comes upon us. 

SpinachWontonRavioli3.jpg

Interrupted by a phone call from "Papa" asking if it was snowing by us because we get all kinds of different weather in different parts of this city at the same time—lo and behold, large, fluffy snowflakes tumbling down right under our nose, and not the Parmigiano Reggiano ones, but the real ones!  We dropped everything, and ran to get our boots, coats, mittens, bonnets and scraves—the whole bundle—so that we could play under the snowfall.

Spinach Wonton Ravioli

INGREDIENTS//yields 35 raviolis

• 500 grams spinach, fresh (cooks down to approx. 250 grams)
• 250 grams ricotta cheese
• 3 heaping tablespoons Parmigiano Reggiano, grated
• 1 egg, divided (yellow and white)
• Pinch of nutmeg
• Salt and pepper, according to taste
• 1 pack wonton wrappers


INSTRUCTIONS

Take a large pot and fill it with roughly 3 inches of water.   Bring the water to a boil.  Add your fresh spinach and some salt and close the cover to steam your spinach.   It should take about 5 minutes.  Once it is a saturated, dark and wilty green, take it off the stove and let it cool on the side.

Place your egg yellow, ricotta cheese, Parmigiano Reggiano, nutmeg, salt and pepper in a medium size mixing bowl.  Mix by hand.

Take your cooled down spinach and squeeze out as much excess water possible.   Place it on a cutting board and chop finely.

Add the spinach to the mixing bowl with the rest of the ingredients and mix it together.

You can also transfer the spinach to a food processor and process with the rest of the ingredients until smooth if you don't want to mix by hand.

Lay out your wonton wrapper and place 1/2 tablespoon of the spinach filling in the center of the wrapper.

Brush some egg white along the edges of the wonton wrapper and take one corner of the wrapper and fold over to meet the other corner.  Gently press down from the center towards the edges to press out any air and to seal the wonton ravioli. 

Dust a baking sheet with some flour and line up your raviolis.

Bring a large pot of salted water to boil.   Add some raviolis making sure not to overcrowd them in the pot.  Boil for 3 minutes and take them out with a slotted spoon and transfer them to a plate.

Grate some Parmigiano Reggiano and drizzle some olive oil over the spinach wonton raviolis and serve immediately. 

NOTE

The wonton skins are delicate and they cook quickly.   They will burst if you let them cook too long.
My mother in law gave me a great tip...I freeze a whole untreated lemon so that I have it on hand for use.
I grate a bit of this frozen lemon over my raviolis along with the grated cheese and olive oil for a fresh twist. 
 

Hijiki Tofu Patty

Reminiscing my Dojo days in NYC...

Back in the 80's and early 90's, vegetarian restaurants were few and far between to be found in New York.  As far as I could recollect there was Dojo which was a vegetarian friendly restaurant, Angelica's Kitchen, a vegetarian restaurant and Souen, a macrobiotic restaurant.   I ate at these places so often when I was a student at NYU that it has pretty much shaped the way I eat regularly.  I love all things tofu, sea vegetables, rice, beans, and veggies.  Give me a hijiki tofu burger from Dojo's or a dragon bowl from Angelica's anyday.

Since Dojo's hijiki tofu burger and their carrot ginger dressing recipe are top secret,  I can only do a rendition of it— but it's oooh, so goodThis is one of my fave comfort foods and it runs in the family. 

Serve it along with some brown rice, fresh raw veggies, topped off with Dojo style carrot ginger dressing. 

DRIED HIJIKI

DRIED HIJIKI

The yin and the yang of food...

Growing up my mum always told me "oh, you're too yin",  meaning that my body was deficient in qi or vital energy.  I always had cold hands and feet no matter how hot and humid it was on a summer day which is a symptom of yin.  I even wore socks under my duvet covers.   She would place bowls of tonic soups in front of me urging me to eat.  Soups such as yam and ginger slices, and Chinese herbal chicken soup comprising of korean ginseng, red dates (jujubes or hong zao), astragalus root (huang qi), codonopsis root (dang shen), and Chinese yam (huai shan) . Then there were the tea concoctions such as astragalus, red dates, and goji berries.   These replenishing soups and teas were to increase my yang in order to restore the balance in my body.  If I had chapped lips, I was suddenly told "oh, you're too yang", and that was quickly followed up with more soups and teas such as the green bean soup (mung beans or lu duo) with rock sugar and the chrysanthemum tea to increase my yin.

The relative levels of yin and yang in our bodies are continuously changing and they need to coexist harmoniously.  Most of us are naturally more yin or yang.   When out of balance symptoms can be observed like those cold feet and chapped lips of mine.

Hijiki is one of hundreds of seaweed types that can be classified as a brown seaweed and is considered yang.  Seaweeds break down into three broad basic categories: red algae, green algae and brown algae.  You can buy dried hijiki at any of the Japanese or Korean food stores on or near rue St Anne in the 1er or 2e arrondisement of Paris.  It is first soaked in water and then drained to use in cooking with other ingredients.

Hijiki Tofu Patty

PREPARATION

Soak hijiki in 2 cups of water for 30 minutes.
Press and drain tofu for 20-30 minutes.

INGREDIENTS//yields 8-10 patties or 4 burger-size patties

• 5 grams dried hijiki seaweed
• 12 ounces firm tofu
• 2 cloves garlic, minced
• 1 teaspoon ginger, fresh and finely grated
• 1 medium carrot, grated
• pinch of ground white pepper
• 1 tablespoon white miso
• 1 tablespoon toasted sesame oil
• 1 teaspoon tamari sauce
• 2 scallions (white and light green parts finely chopped)
• 2 teaspoons sesame seeds, toasted

INSTRUCTIONS

Soak dried hijiki in warm water for 30 minutes, rinse and then drain.  Set it aside.

To rinse and drain liquid from the tofu.  Cut through tofu in 1/2 inch slices and press between heavy cutting boards to drain any excess water for about 30 minutes or simply use a cheese cloth to squeeze out the excess water.  The tofu will be crumbled anyway.

Sauté the carrots, garlic, and ginger in a tablespoon of vegetable oil until the carrots are limp.  Add a pinch of white pepper.  In a bowl, add the miso and crumble the tofu.  Use your hands to mix the crumbled tofu and the miso paste together. 

Stir in the cooked carrots and the hijiki.  Then add the tamari sauce, sesame oil, scallions, and sesame seeds. 
Mix it all together.

Form the mixture into round patties and place them on a baking sheet.  Bake until golden brown, about 30 minutes at 175° C (350° F).

Carrot Ginger Dressing
 

INGREDIENTS//yields 1.5 cup dressing

• 3 large carrots, peeled and chopped
• 1 large shallot, peeled and chopped
• 1/2 thumbs length fresh ginger
• 1 tablespoon sweet white miso
• 3 tablespoons rice vinegar
• 2 tablespoons roasted sesame seed oil
• 1/4 cup grapeseed oil, olive oil, or vegetable oil
•  4 tablespoons water

INSTRUCTIONS

In a blender or food processor add the carrots, shallot, and ginger and pulse until finely chopped.

Scrape down the sides with a spatula.  Add the miso, vinegar and sesame seed oil and blend together.

Add some water and slowly drizzle in the oil. 


NOTE 

I also like to add zucchini to the hijiki tofu patty mix.  You can simply add a half zucchini (grated) in with the carrot and sauté together.   Then follow the rest of the directions.  As I've said before any extra veggies I can sneak into a recipe makes me feel good, especially when I watch my kids gobble it up!


Pâté aux Pommes de Terre

Tourteauxpommesdeterre2.jpg
pâtéauxpommesdeterre3text.jpg

There was an interesting article in the NY Times a few months back.  It was about families in the city and in Brooklyn forming tight-knit communities who live in the same building or in the same neighborhood.  They were willing to sacrifice space and to stay put in their close-fitting apartments to forge their children's close relationships with their neighbor's children.  It then turns into a nice network between the parents where they can rest worry free knowing that their child is just next door, upstairs or downstairs.   Inevitably, gatherings and dinners are hosted between them deepening their relationships, and eventually leading to kid sleepovers and babysitting swaps.  

This story hit home.  I live in a 14-story building and I keep an open door policy the minute the kids get home.   They are usually rotating between our home and their neighborly friends' homes.  Instead of running through backyards, my kids are runnng down the hall or up and down between floors of our building.  They love this liberty of being able to run between their friends' apartments on their own.  I love it too since I know there is always a surrogate parent around to keep an eye out for them, one of whom is my neighbor Natalie.  

Nat is originally an Auvergnate (someone from Auvergne, located in the middle of France).  Just a tidbit of history, she comes from the ancient provinces of Bourbonnais (where the long string of Kings in France were sired) which now comprises territory in the department of Alliers, and some in the department of Puy-de-Dômes and Cher.  Alliers and Puy-de-Dômes make up part of the Auvergne region.   Fast forwardNat has a daughter who is in the same class as my daughter.  Needless to say, our daughters spend a lot of time together which in turn means we moms usually find each other around wine o'clock for a quick catch up and to pick up or drop off the kids.  It was during one of these times that I found myself in her apartment, glass of red in hand, learning how to put this charmingly simple pâté aux pommes de terre together.   A speciality dish from Bourbonnais—her personal tip to me was "lay that butter on"!

Pâté aux Pommes de Terre

INGREDIENTS//serves 6

• 1 medium size onion
• 4-5 medium size potatoes
• 2 pâtes brisée (tart pastry)
• Bunch of fresh flat parslely
• 50 grams unsalted butter
• 20 cl crème fraîche
• Salt and pepper according to taste

INSTRUCTIONS

Slice your onions thinly and put it aside.

Peel your potatoes.  Using a mandoline or a sharp knife slice the potatoes into slivers.  Salt them slightly and put them aside.

Take your tart or quiche pan (around 10 inches in diameter, 1-1/2 to 2 inches deep or 25 cm in diameter, 4 cm deep) and roll out one tart pastry and place it into the pan.  Press the pastry into the sides of the pan. 

Use a fork to poke some holes into the bottom of the tart pastry and place in the oven to bake for 3-5 minutes so that it's slighty baked.  Take it out of the oven and then begin layering your ingredients.

Getting back to your potatoes, wipe off the excess moisture and place a layer of potatoes covering the entire tart pastry.  Follow up with a layer of sliced onions, then snip (I love to use scissors in the kitchen) some parsley leaves all over.  Add slivers of unsalted butter all around.  Repeat the layering until you have used all your ingredients.

Roll out your second tart pastry and place it over the layered potato tart.  Fit the top into the tart.  You'll need to press down gently along the top edge of the tart pastry to even out the crust edges with the underlying tart.  Then press along the sides to seal the pastry together.

Take a paring knife and with the sharp tip cut out a one inch circle in the middle of the tart pastry.

Place it in the oven at 190° C (375° F) for 45 minutes.

The tart pastry should be golden brown.  Take it out of the oven. 

Keep your oven mittens on.  Hold onto the pan and use the paring knife with your other hand to cut along the interior seam of the potato tart.

Take a large size spatula and slip it under the top tart pastry and lift up to place it on a flat surface on the side.

Prepare the crème fraîche.  Add some salt and pepper and stir it up with a fork.  Scoop out the the crème fraîche and spread it all over the open face potato tart.   Finally, cover it with the tart pastry that you lifted off earlier and put it back in the over for 5-10 minutes so that the crème fraîche spreads through the layers.  Then it's ready to be served.  Bon appétit!

Healthy Baked Salmon Panko Crusted Nuggets

BakedSalmonPanko4.jpg
BakedSalmonPanko11.jpg

Panko is a Japanese breadcrumb.  It is airier, flakier, and crispier than the Western breadcrumbs.  It adds a delicate crunch to whatever you coat it on and seems to make everything taste good.   Pan means bread in Japanese and ko* means child.  I guess we could think of it as offsprings from a bread loaf?   A popular plate in Japan is tonkatsu which is a deep fried pork cutlet that is coated with panko crumbs.  It's usually served along side with shredded white cabbage.  I stopped eating meat a long while ago so I usually use fish, tofu, beans, or nuts as meat replacements.  I loved tonkatsu as a kid.  Because the tonkatsu is fried, I naturally craved the raw cabbage salad on the side to combat all that grease in my stomach.  So if you want to opt for a healthier alternative using the baking method, try this baked salmon panko crusted nugget recipe. 

Bull-Dog tonkatsu sauce is the dressing and dip for the cabbage salad and the tonkatsu.  The sauce has a flavor that consists of apple purée, tomato paste, carrots, prune paste, onions, and apricot purée.  It's basically an interpretation on the Worcestershire sauce suited for Japanese cuisine.  It is sweeter and thicker.   To reconcile my Asian taste buds and fond memories of my times in a tonkatsuya (tonkatsu house)—a place specialized in serving tonkatsu and perhaps other deep fried dishes, I serve this baked panko crusted salmon dish with a side of shredded white cabbage using the Bull-Dog tonkatsu sauce for myself.   Otherwise it's a versatile dish.  It can be a starter, snack, hors d'ouevre or main dish and you can serve it with a tartar sauce dip.

Baked Salmon Panko Crusted Nuggets

INGREDIENTS//yields 18 pieces

• 1 cup (50 grams) panko
• 1/2 teaspoon black pepper
• 1/2 teaspoon white pepper
• 1/2 teaspoon salt
• 2 salmon fillets, deboned (180-200 grams, approx. 6-7 ounces)

INSTRUCTIONS

Heat up a medium size pan over medium heat. 

Pour the panko crumbs into the pan and stir often until it turns golden brown.  Once golden brown, take it off the heat and let it cool.  Mix in your black and white pepper, and salt.

Pre-heat your oven to 200° C (between 390°-400° F)

Take your salmon fillets and cut them into little square pieces about 1/2 - 3/4 inch thick (about 1 1/2 cm).

Place the salmon into the panko crumbs and press down with your palms with enough pressure so that the crumbs stick.  No egg and flour involved here!  The piece of fish will flatten out a bit. 

Place each piece onto a baking tray.  Then place in the oven for 10 minutes unitl golden brown.

Homemade Tartar Sauce

INGREDIENTS//yields 1/2 cup

• 1 tablespoon cornichon, finely chopped (about 10 pieces)
• 1/2 shallot, finely chopped
• 1 teaspoon capers, finely chopped (about 10)
• 1 teaspoon dijon mustard
• 1/2 cup mayonnaise
• 1 lemon wedge
•  Salt and pepper (adjust to taste)

INSTRUCTIONS

Finely chop your first three ingredients: cornichon, caper, shallot. 

In a bowl, add the finely chopped ingredients with the mustard. 

Then fold in the mayonnaise. 

Squeeze some lemon.  Add salt and pepper to taste.

NOTE

I bought two salmon fillets that were 180 grams and 200 grams each.  I got 18 nugget pieces out of it.  Depending on how thin or thick you cut your pieces of salmon,  oven time may be shorter or longer.  Just be careful not to overcook your fish—nothing is worse than dried out fish. 

*My Japanese friend Yoshi pointed out to me that "ko" in panko is this Japanese character (粉 ) which means powder.  The "ko" I was referencing is this character (子) which means child.   It all sounds the same but has different meanings.   You think this is considered a homonym in Japanese?!


Heartwarming Red Split Lentil Soup

RedLentilSoup.jpg

Brrr, winter season is right around the corner and this soup fills me up and keeps me nice and toasty.  One of the best things I love about Paris is that it is full of ethnic diversities.  You can find pockets of many ethnic communities spread thoughout this city.  I love the idea of being able to dash over to the 15th arrondisement just to pick up a date syrup at a Persian grocery store.  This is where you will find a restaurant row of Persian cuisine and grocery stores a.k.a Petite Perse or Little Téhéran.  As I enter the grocery store, my sensory receptors are instantly heightened, things seem foreign and I am intrigued.  This is where I can easily pass an hour picking up every jar and package to decipher its labels, discover ingredients and wonder how these things are used.  What gives me pleasure is the feeling of having purchased my date syrup straight from Persia—minus the cost of airfare and flight time!  I appreciate every drop of syrup that comes out of the jar because I know it has traveled a long way.  Plus, it's a nice conversation piece.  "Oh, the date syrup? I bought that from  ̶P̶e̶r̶s̶i̶a̶,  umm—I mean the Persian grocers in the 15th..."

I can carry on about other goodies that I buy from Litte Africa (Chateau Rouge in the 18e), Chinatown (Ave de Choisy in the 13e, Arts et Métiers in the 3e, Belleville in the 10e, and Little Tokyo (rue St. Anne in the 1er and 2e) but it'll be a long list.  Today I was in La Chapelle (Little India in the 10e) for a baby bump portrait session.   I was early so I picked up some mangoes and red split lentils for this recipe and made a pit stop at the no-frills Indian take-out joint for its chai.  With my hands cupped around the chai, I stepped out in the cold and hovered over it.   I took in the scent of spices wafting up from my masala chai, lifting my head towards the streets in front of me and with a long exhalation felt removed from wherever it is that I come from.  It didn't matter. 
Today, I was in India.

Red Split Lentil Soup


INGREDIENTS//serves 6

• 1 tablespoon of olive oil
• 3 carrots, diced
• 2 stalks celery, diced
• 1 onion, diced
• 1 clove garlic, minced
• 1 bay leaf
• 1.5 teaspoons coarse salt (adapt according to taste)
• 2 teaspoons cumin seeds
• 1 tablespoon tomato paste
• 1.5 liters vegetable or chicken broth
• 2 cups lentil (red or yellow split lentils)
• 1/2 teaspoon curry powder
• 1/2 teaspoon curcuma (or tumeric powder)
• Bunch of fresh coriander (cilantro)
• 1 wedge of lime

INSTRUCTIONS

Heat the olive oil over medium heat in a medium Dutch oven or heavy pot.  Then add the diced carrots, celery, onion, minced garlic and bay leaf.  Add some salt and mix.  Cover the pot and let it cook for 5 minutes.  

Uncover and add the cumin seeds, stirring it around.  Then add the tomato paste, the liter of vegetable broth and lentils.  Bring it to a boil. 

Turn down the heat to a low simmer.  Add the curry powder and curcuma.  Cover and let it simmer for about         15 minutes or until the lentils are soft. 

I usually take a cup of the soup and pour it in the blender with a small handful of fresh coriander.  Then I stir this back in with the rest of the pot.  It gives it a chunkier consistency.  Squeeze a bit of lime and garnish with fresh coriander.

NOTE

It's kind of a cross between lentil soup and lentil curry.  You can add more liquid to it for a soupier mix or less liquid for a thicker consistency.  If you opt for the thicker consistency, you can top it over some basmati rice for a more filling and curry like meal.

P.S.  I just had to throw this one in the mix...