Luo bo gao (蘿蔔糕)served with a savory hot sauce.
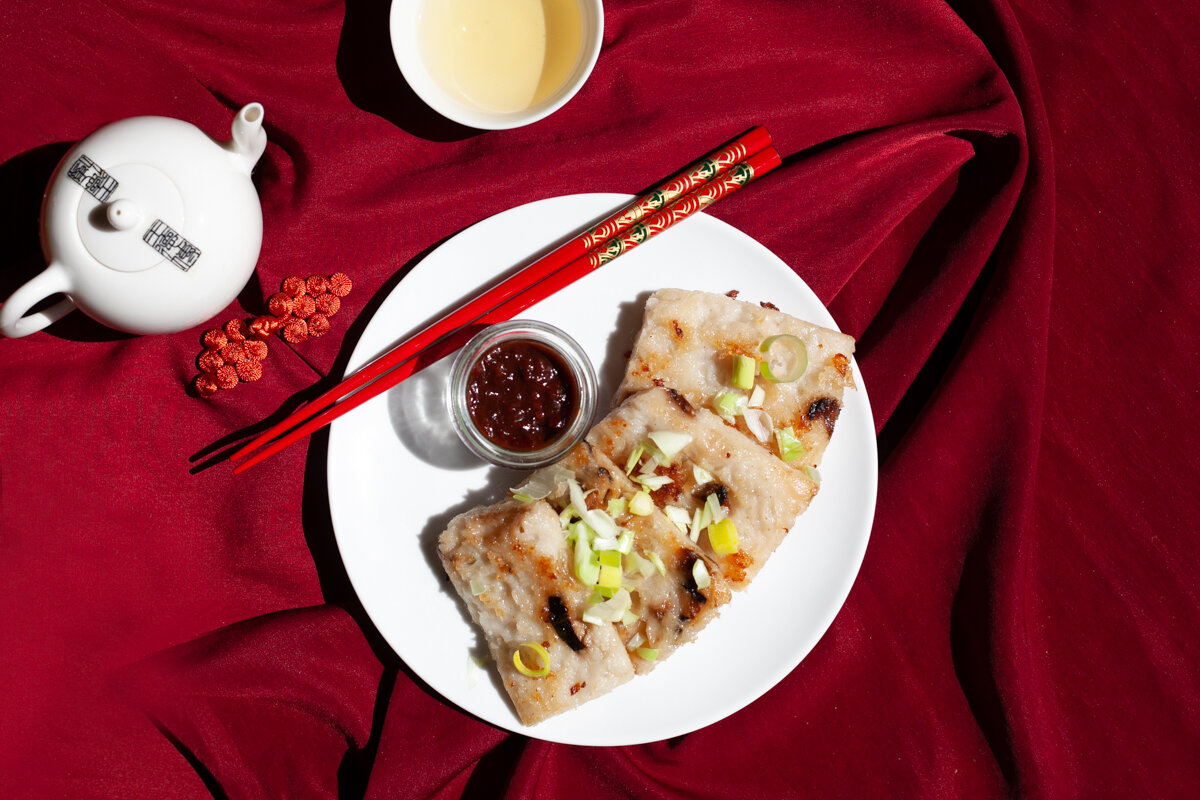
Luo bo gao is a dim sum staple.
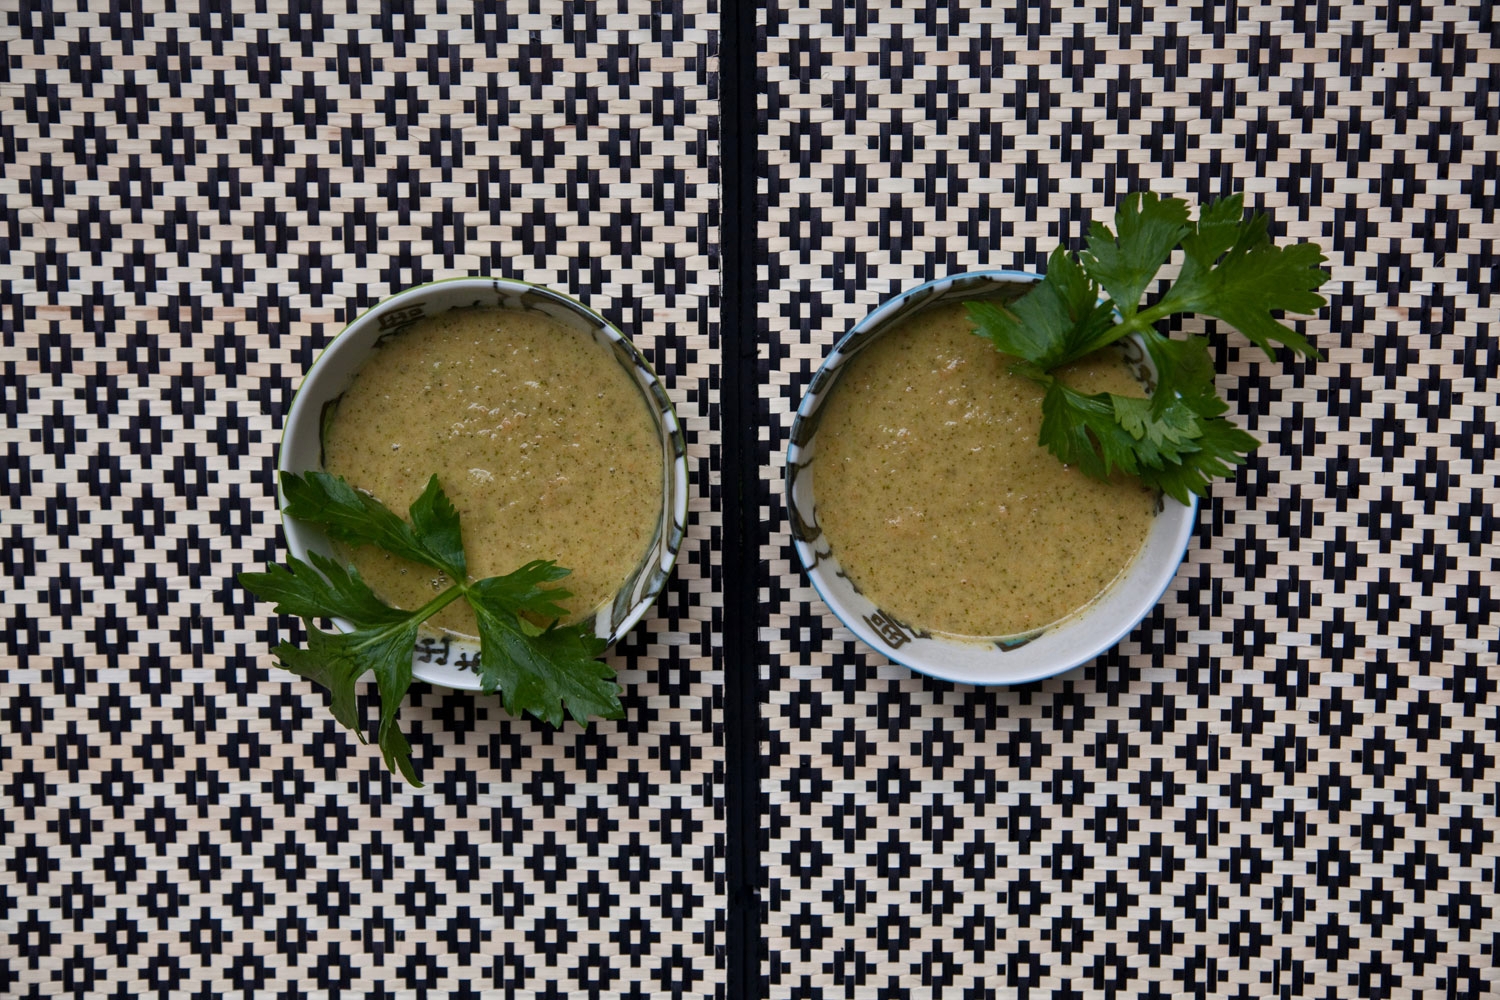
Do you remember those bountiful green turnip tops I was boasting about the other day? Yep, it fed me well and it’s an easy-peasy, nourishing, clean feeling green soup to make. Well, I got stuck with the turnips after that. Turnips have turned up in my AMAP basket in the past two weeks. Their tops get eaten rather quickly but what to do about the bulbs? I enjoy the occasional raw turnip grated into my salad, especially when I mix it up with grated carrots and beets. I tend to keep this grated mix on hand in a jar to top off my salads whenever I find turnips in my weekly basket. That takes about one or two turnips but what about the rest?
Roasting is another way to go. I try to conceal them in with the potatoes and other vegetables but I find my kids ignoring them and casting them off to the side for me to pick up and eat, which I do,— with a smile— to show them that they are just as good as the others. Really though, deep down inside I do prefer the other veggies.
As I stared at all the beautful white and purplish turnip bulbs on my kitchen table I had to find another solution for them. That’s part of the fun when receiving locally grown seasonal vegetables. We’re not meant to love them all but finding a way for them to be liked and acceptable at the table is a position I take pride in. I hate leaving other veggies behind and I think of my kitchen as a lab experimenting, incorporating and introducing new and old flavors with their individual characteristics and playing with texture to give it a makeover. Then, we can give it another chance. This is my No Vegetables Left Behind Act.
My white purplish turnips (western turnips) are not the typical turnips that one would use to make the traditional Chinese turnip cake, lo bo gao (蘿蔔糕). Usually it’s a daikon, a Japanese radish which is long and white. Lo bo gao is a dim sum dish that is always ordered as a part of my family’s menu at brunch. I am missing my NYC Jing Fong days. Jin Fong is a must on the list of eats in NYC. It’s a gastronomical and visual experience and you feel like you’ve been transported to Hong Kong. You can get your traditional dim sum there along side with 800 other people sitting around sharing round tables. I really hope it will survive this horrible coronavirus period, sigh.
Returning to all those turnips staring back at me, I had the perfect opportunity to recreate this dish and to use up all my turnips. Here I stood cooking and reminiscing about the many brunches at Jin Fong with friends and family from the past and daydreaming hopefully to bring new friends and family to share in this tradition.

Grated turnips.

Simmer unitl softened.

Rice flour and corn starch mix.

Combination of turnips, rice flour/corn starch mix, shitake mushrooms/onions toppings.

Batter poured into a mold ready to steam.

Luo bo gao steaming inside wok for approximately 45 minutes.

Let it cool after steaming and then slice into small rectangular or square pieces and pan fry each side until golden.
You can actually eat it steamed and opt out of the pan fry option but most people prefer the pan fried turnip cakes.
Turnip Cakes
PREPARATION
Rehydrate the shitake mushrooms by soaking the dry mushrooms in tepid water until it softens.
INGREDIENTS//Yields 8 rectangular pieces and a couple of odd ones
• 500 grams turnip, freshly grated
• 1 1/2 cup water
• 140 grams rice flour
• 1 tablespoon corn starch
• 3 dry shitake mushrooms, rehydrated (see NOTE below for other common traditional options)
• 1 small onion, diced
• 1/2 teaspoon salt
• white pepper, adjust accordingly
INSTRUCTIONS
In a large pot add your grated turnips and a cup and a half of water and bring it to a boil. Then lower the heat and let it simmer unitl the turnips soften. About 10 minutes after boiling point.
Drain the turnips and keep the liquid. It should give you a 1 1/3 cup of water. If not, just add more water to it to make up the difference.
In a skillet, sauté your mushrooms and onions (or other dry ingredients, NOTE below) together. Set it aside once cooked.
Prepare another mixing bowl for the rice and corn starch. Add the salt and white pepper to this dry mix.
Then use the drained liquid from the turnips and mix it in with the dry ingredients.
Add the turnips and stir, following with the sautéd mushrooms and onions.
This will produce a wet paste-like batter.
Set up a steamer and bring the water to a boil.
Using a mold that fits into a steamer (I had a 9-inch round cake pan I used for my mold but you can use a rectangular or square mold that fits in a steamer).
Be sure to oil it all over and then pour the batter in. With a back of a spoon spread it across the batter to smooth it out.
Steam the turnip cake for 40 minutes over high heat, replenishing the water in the pot as necessary.
Take a toothpick and poke through the cake to test if it comes out clean. If so, set it aside and let it cool.
After it has cooled down take a knife and slide it around in between the cake and the mold to loosen it.
Flip it over onto a cutting board using a spatula to help it out if necessary.
Cut it into rectangular or square shape pieces.
Add some oil to a cast iron skillet or a non-stick frying pan and fry each side until golden brown.
Serve with a dipping sauce (hot chili oil, soy sauce, bean sauce, oyster sauce ,chili garlic sauce, sriracha or a combination of any of those)
NOTE
In the last photo above you will see the steamed turnip cake out of its mold. In this particular cake I used Chinese sausages and shitake mushrooms. These are traditional fillings and I made that for my family who are omnivores. We generally use dried sausages, dried shrimps, or dried scallops (my fave) and dried mushrooms since they hold less water and add flavor. You could probably add pork bits for flavor and texture too. I made a second one that is vegetarian, only with mushrooms and onions as that’s what I had available.
I’ve only made this twice and both times I used different amounts of rice flour and water. I found, with less water and rice flour, the consistency of the turnip cake was less dense.
You can actually eat it steamed and opt out of the pan fry option but most people prefer the pan fried turnip cakes.