
I recently adopted some kefir grains about two months ago. It traveled all the way from Bangkok to meet me in Paris. My friend Silvia lives in Bangkok and comes to Paris for her annual holidays. She has a generous heart, is waste conscious, and she's the one who bestowed me these clumpy, glutinous kefir grain jewels. If you are lucky, you'll find someone to share some grains with you too.
Being a newbie to any cultural or fermentation process, I admit I was a bit dubious in the beginning about caring for these grains. I grew up with the notion that milk should be refigerated at all times otherwise one would get deathly ill from drinking spoiled milk. Calling out for my stomach of steel and rolling up my sleeves, I embraced this thoughtful gift that traveled distances just to be with me knowing its full health benefits but wary of the road never taken.
Kefir grains contain a yeast and bacteria starter that ferments the milk. Having several different strains of yeast and bacteria in it makes it a powerful probiotic source, as well as being high in calcium, protein, vitamins and other minerals.
The simplest way I care for my kefir grains is to use them everyday to produce kefir milk. I produce a cup of kefir milk per day with my grains. As long as they stay healthy, they are re-usable. You should achieve a consistency of a drinking yogurt. Milk kefir may taste more sour than yogurt which is normal. You can alter the consistency and the taste of the milk kefir by playing with the fermentation time.
MILK KEFIR
INGREDIENTS//Yields 1 cup
• 1 cup whole organic milk (cow, goat, or sheep's milk—just stick to the same one)
• 1 tablespoon active kefir grain
INSTRUCTIONS
In a clean glass jar place your active kefir grains and pour in a cup of milk (straight from the fridge.
Cover the jar with a tea towel, cheesecloth, or paper towel.
Place the jar in an area avoiding direct sunlightwith room temperature around 21°C-30°C (70-85°F).
Let it sit for 24 hours. Check after 12 hours to see if the consistency of the milk has thickened or clumped. If so, give it a taste to see if it has a tartness to it. Then, it's ready for use.
Milk ferments faster in warmer temperatures and slower in cooler temperatures. Usually it takes 24 hours for it to be ready in an ideal room temperature environment.
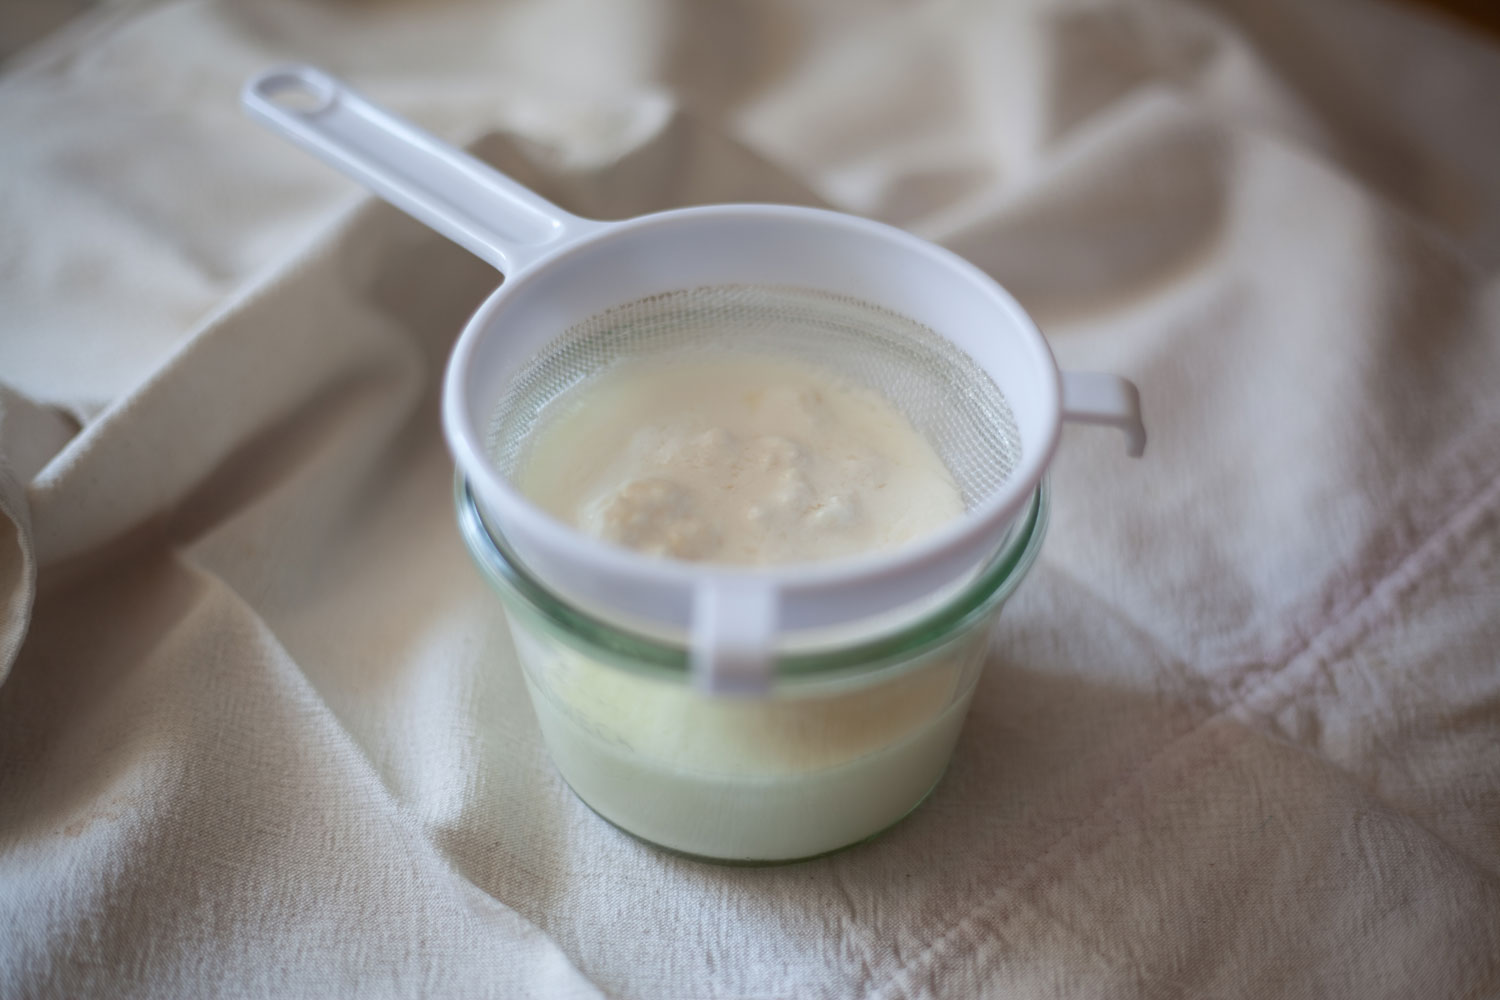
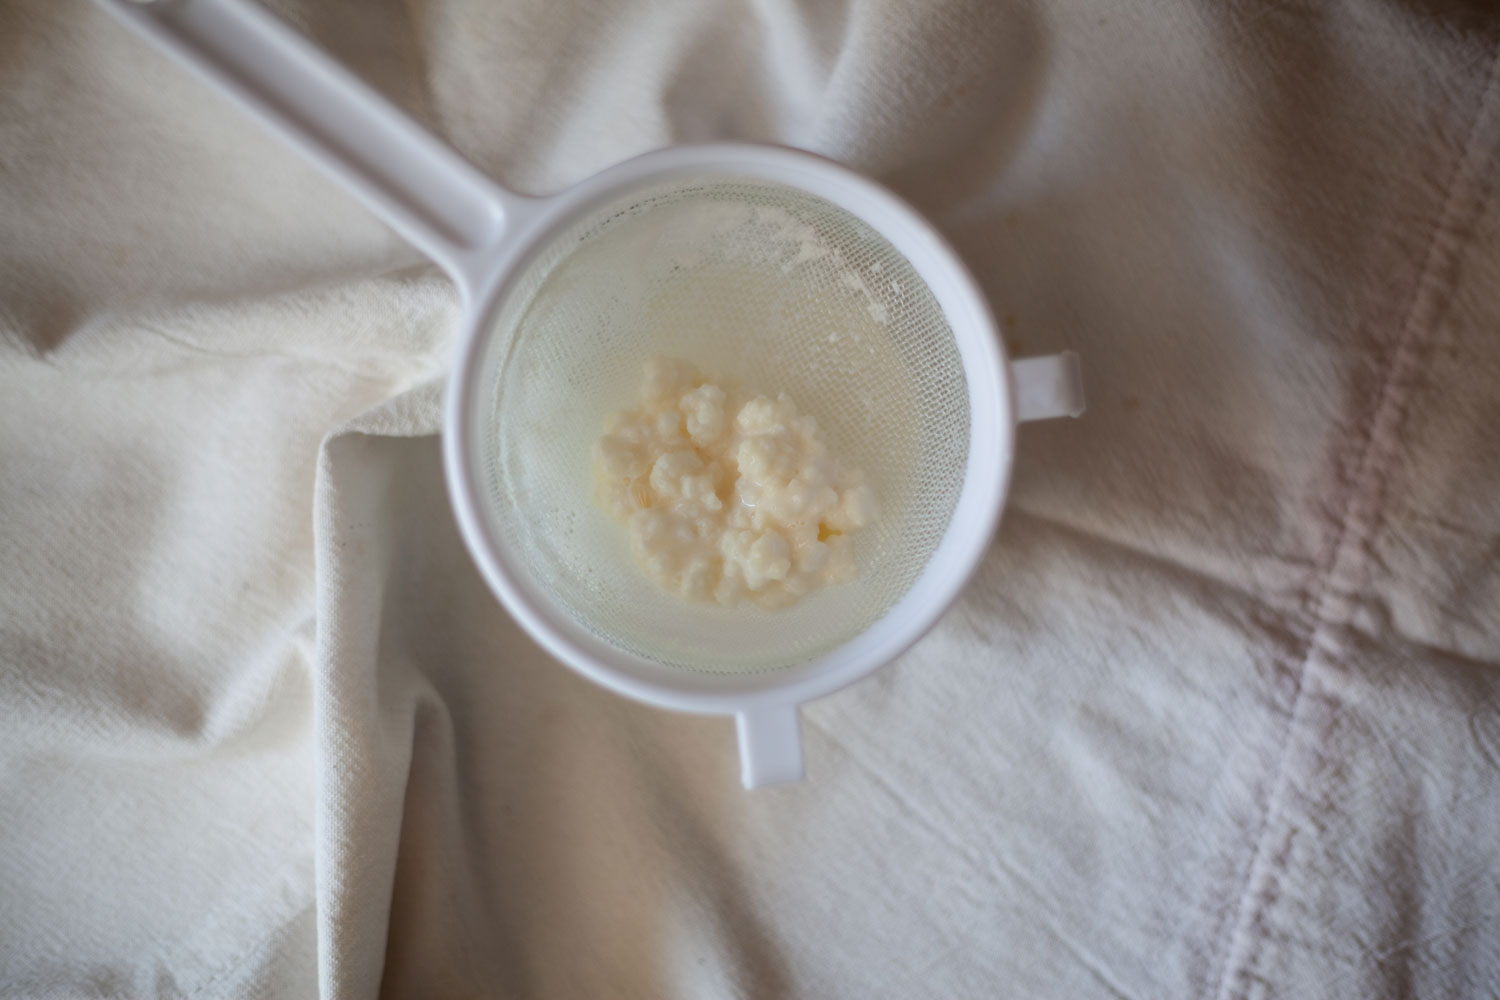
Once it's fermented according to your taste buds, pass the milk kefir and its grains through a plastic strainer into the container for the milk kefir.
Scoop out the grains and begin the process again by adding fresh milk into another clean glass jar.
NOTE
When Silvia arrived in Paris at the end of June, it was still 18°C while Bangkok was near 40°C. It took us days for our first batch of milk kefir to form. Once it started warming up in Paris, I was able to get a batch of kefir milk in 24 hours. Remember that these are active grains, you want to keep them nourished so constantly feeding them with fresh milk (not ultra-pasteurized milk) will keep them healthy and growing. You want to keep the clumps small so that they have more surface area to be exposed to the milk which in turn feeds them and nourishes them so that they can mulitply.
Also, best to use a plastic strainer as metal can damage the grain.
You can also make non-dairy kefir.